For most Kenyans looking to own their own home, buying an existing house is a great option. And there are lots of choices available for purchase. But what happens when you have something specific in mind?
Building a house gives you the chance to have one that fits your exact needs and specifications. From the floor plan and design to new-customized fixtures and fittings.
However, supervising construction workers, picking supplies, getting government permits, and overall project management is not a walk in the park—especially for first-timers.
In this guide, we make the seemingly complicated process easy by breaking it down into the following stages.
Looking for land
Ensuring finances are in order
Deciding on the size and house plan
Hiring the right professionals
Building the house
1. Looking for Land
If you already have the land to build on, this is perfect. But if you don’t, the first step is to decide on the location, size and how much you are willing to spend to buy the piece of land. You could either look for land for sale online. Or, speak to a real estate agent to advise you on the area you’re considering and negotiate the best buying price.
An agent will usually charge between 1 -10% of the price of the land, which is a negotiable fee. You can either confirm from your agent or personally from the ministry of lands the following information:
Who owns the land
What is the zoning structure
What permits you will require
Whether the land has clear boundary marks
Some of the costs you will incur aside from the land price are:
Land rate clearance certificate: Pay Kshs 10,000 to the County where the plot is located. You will get the certificate within 48 hours.
Land maps: This is from the Lands Ministry in Ardhi House and is issued in duplicate. You will pay Kshs 300 for each.
Ground verification: Boundary marks on the piece of land are called beacons. If they’re not present, you will pay Kshs 1,000 for each beacon.
Legal fees: This is to ensure the land transaction is in writing. This will cost between 1-2% of the price of the land with a minimum of Kshs 35,000.
Stamp duty: The amount you pay is based on the value of the land. It is usually 4% for urban land and 2% for rural land.
New title deed certificate: This is the official document that shows you are the owner of the land upon completion of the transfer. The certificate costs Kshs 5,000.
2. Deciding on Your Financing
Unless you have a huge amount of money lying around, you are likely to seek financing from a bank. A construction loan is usually more difficult to get than a traditional mortgage as you are asking for money for a concept and not a physical house.
When you approach a bank to get financing, you will need an estimate of the cost to increase your chances of getting an approval. This includes detailed floor plans, budget plans and materials needed to complete construction.
The costs attached to the construction loan include:
Down payment for a construction loan: between 20-25%
Interest on loan: between 12-14%
Home insurance: to cover the cost of reconstruction in case of a hazard like fire
Life assurance: you will need to assure your financier that the loan payments will continue in the event of death or inability to service the loan
Some financiers do offer the option of including the cost of purchasing land as part of the amount; others offer just the construction costs. Speak to at least three different loan providers and compare terms before settling on one.
After the approval, the money is released in installments after achieving set milestones. Some banks will require you to only make interest payment during construction as opposed to a higher amount. This gives you flexibility and more time to save. Others require you to pay off the amount after completion.
You are likely to spend more than your initial budget. To cushion yourself for these miscellaneous costs, have an extra 10% over your budget to be on the safe side.
When coming up with a budget, don’t forget to factor in 16% VAT on the cost of items.
3. Deciding on the Size and House Plan
It’s easy to get carried away when building a custom home because you’ll want everything to fit your style. But there is absolutely nothing wrong with starting small then adding the extras once you’re financially able.
How do you come up with the house size and design? Here are a few things to consider:
Number of bedrooms: an ideal house should have enough rooms per person to sleep individually plus a guest room/office. That is aside from the couple of the house.
Number of bathrooms: at least two. One for the master bedroom and another one for the rest of the family or guests.
House layout: if you have a baby, make sure the nursery shares a wall with your master bedroom to keep them close by. No other bedrooms should share walls for privacy. The master bedroom should be in the rear of the house, away from the street.
House ground: the home should be surrounded by flat land. The larger the buffer between your entrance and the road/sidewalk, the better for noise and safety.
Direction: a house facing south tends to get most of the sunlight throughout the day. Have your main rooms face east and west to get the lovely sunrise and sundown.
Square footage: work with your architect to estimate this based on the house plan you chose. After determining the square foot, you are in a position to determine the optimal land to building ratio; which ensures you use the land to its full potential. This is calculated by dividing the square footage of the land by the square footage of the building.
For example, if you have 200,000 square feet of land and 53,000 building square feet, this equals 3.77.
This is too high. The ideal number should be between 2.5 – 3.5. A higher ratio means you have excess land, while a smaller one means your house will be too squeezed.
Try walking around in different neighborhoods to look at vacant houses to get inspiration. Pinterest is another site which has a variety of fantastic house plans you can replicate. You can also take advantage of free planning apps like Planner5D to help visualize your home before beginning the construction process.
If you are planning to change homes at some point, consider its future desirability when coming up with the design. For example, having an extra bedroom to serve a growing family. Evidently, your design will have an impact on your overall cost. The more elaborate, the more money you spend. It’s ideal to keep in mind your budget and the size of your land when coming up with the design.
4. Hiring the Right Professionals
We know it’s tempting to take on the project of building a house by yourself in the hopes of saving money. But let’s face it. You probably don’t have any construction experience, and it’s easy to make costly mistakes which could take years to recover from.
Having the right people by your side throughout the construction process will ensure that your house is structurally sound and safe to live in.
These are the essential professionals you need on your team.
Architect
This is the person to bring your vision to life. An architect usually charges 6% of the construction costs, with their main role being to:
Create a detailed drawing of the house plan
Specify requirements and cost estimates
Ensure compliance with the safety and building regulations
Assist in getting financing from the bank.
Suggest or choose subcontractors.
Make site visits to check on progress
Ensure that the architect you hire is licensed and registered by the Board of Registration of Architects & Quantity Surveyors (BORAQs).
Quantity Surveyor
Another key player – the money guy. He ensures you’re working within the budget. You will pay 3-4% of the total construction costs. They are in charge of:
Preparing the bill of quantities; a document providing specific timelines, measured materials and labor for the entire project
Providing cost estimates for the project
Managing costs and staying within budget
Dealing with contracts and legal matters
Breaking down the project into smaller components
Arranging for subcontractors’ payments
Same as the Architect, he/she should be registered by BORAQs.
Electrical Engineer
Essentially, their role is to install services such as plumbing and wiring in your next home. They charge a fee of 2% of the total construction costs. Some of their tasks are:
Ensure all the electrical codes are met
Design, test and install electrical systems
Resolve electrical problems that may arise on site
Help in designing cost estimates of labor and materials
Design the air and plumbing systems
Ensure proper maintenance of equipment on site
Ensure that whoever you hire is a registered member of the
Engineers Board of Kenya.
Construction Engineer
The overseer – the person in charge of the entire project and is responsible for the safety of workers during construction. Apart from this, they will:
Inspect the drawing and design to ensure that the project is feasible
Hire subcontractors, get tools and machines for construction
Supervise the subcontractors
Work with the quantity surveyor to order materials and stay within budget
Their fee is 2% of the construction costs. They should also be registered members of the Engineers Board of Kenya.
Interior Designer
To save on costs, you just might end up moving with the current items you have to your new home. This means you won’t necessarily need an interior designer.
But if you want an upgrade, start by looking up furniture ideas, color schemes, lighting, mirrors and wallpaper. Explore these helpful home décor ideas to start you off. Additionally, there is a need to find a balance between buying decorative pieces and ones that are practical. Each item in the room should speak to the other to create synergy and fit together like a puzzle.
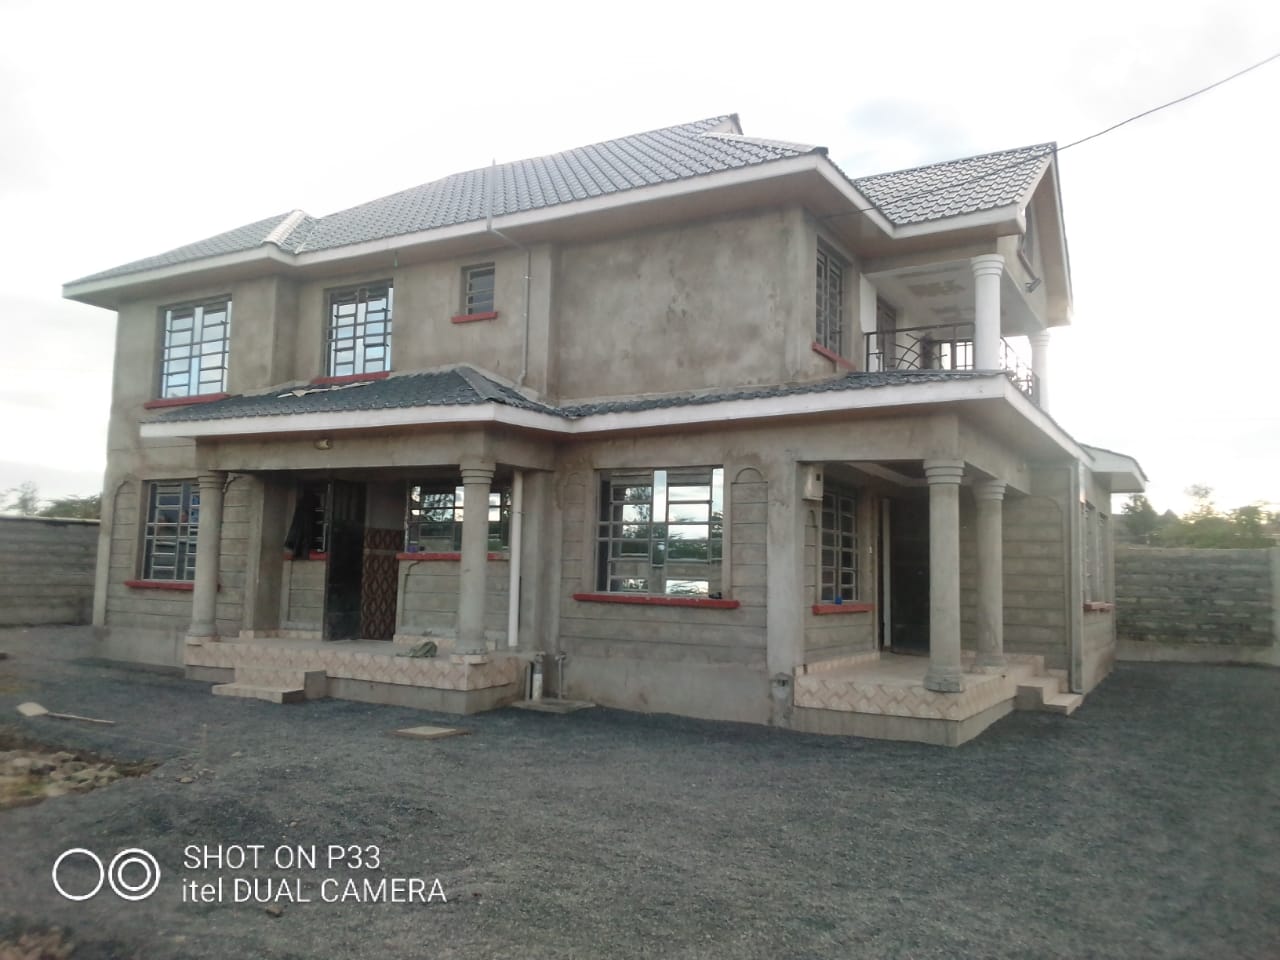
5. Building the House
Now that you have the right team by your side, it’s not time to sit back with no clue of how things are going. You still have to have a hands-on approach and keep them in check to follow your timelines and budgets.
The team of professionals you hire will subcontract workers paid from their own fees to speed up the process. The average construction time could average between seven to twelve months depending on the house size, plan and number of workers.
The construction stages include:
Land preparation: Clearing out debris and vegetation and performing soil tests. This will take one to two weeks, depending on the size of land and how extensive the vegetation is.
Laying the foundation: Excavation of the foundation and pouring of concrete to support steel rods. This will typically take between two to five weeks.
Framing the structure: This is done using wood. Additionally, you need a house wrap to prevent the house from getting moisture and damages from harsh weather conditions. The timelines for this will depend on the size and design of your home. This could take about eight to ten weeks.
Plumbing and electrical: After the house has dried up, electrical wiring, pipes, heating and cooling systems are installed. This could both be done in three weeks.
Roofing: Selecting the roofing design and material will depend on your budget and how long it will last. The developer can advise you on the best option to pick. This will range from one to two weeks.
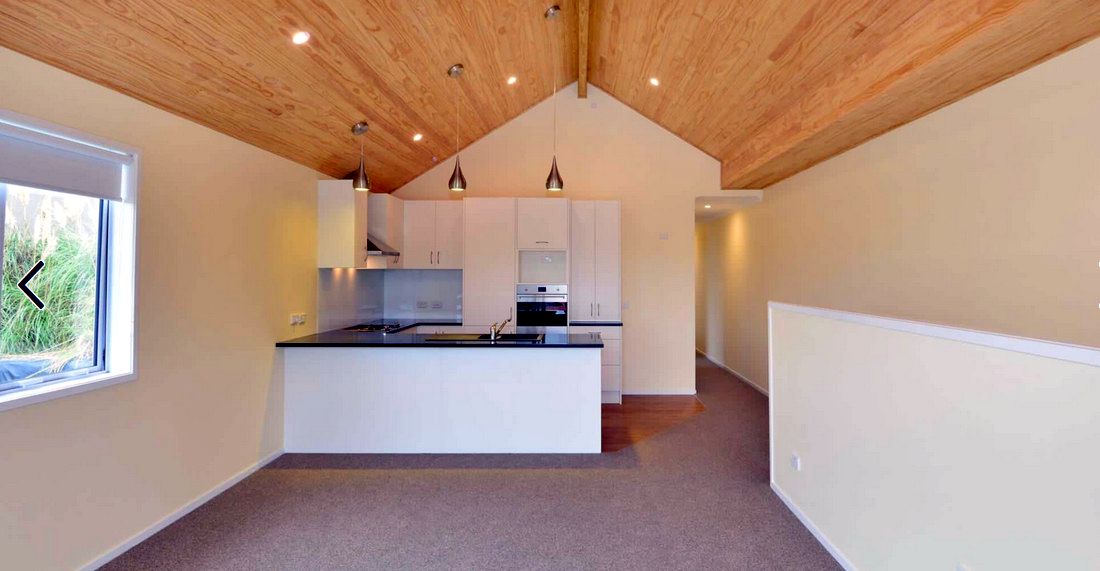
Interior and exterior finishes: Installing doors, windows, kitchen counters, cabinets and work on any exterior fittings. This could take one to two weeks.
Flooring: Type of flooring you settle on will depend on the cost of material and how easy it is to maintain. Some of the types include hardwood, vinyl, ceramic tile, terrazzo, carpet flooring and laminate flooring. These will take any time between one to two weeks.
Decorating: Can be done using the pieces you already have in your current house. Alternatively, you can upgrade with new pieces to fit your brand new house. Depending on the complexity of your decor, this could take between one day to two weeks.
The Seven Key Pillars of Interior Design; Form is the shape of the room, as well as any objects within the room. In other words, it relates to the physical form of anything that is three dimensional. Forms can usually be described as either geometric or natural. Geometric refers to hard lines and square edges, often looking man-made, while natural relates to more organic forms that seem to be created by nature. Forms can also be open – objects that can be looked into or closed – self-contained.
Another thing to take into consideration with form is the proportions and scale of the room compare to the objects being placed within it. Adding forms of similar shapes can create harmony and balance, while adding too many differing shapes can have a confusing result. A space is typically more pleasing if the dominant form is repeated in minor objects throughout the room.
The Seven Key Pillars of Interior Design – Light in Interior Design
The Seven Key Pillars of Interior Design; Natural or man-made light is a critical aspect of any space. Without it, all of the other elements would not be able to shine to their full potential. Light can be broken into the categories of task lighting (defined purpose), accent lighting (emphasizing objects) and mood lighting (adding ambience).
When considering lighting, it is important to address the activities that will be undertaken in the space. Both the quality and quantity should be assessed here. For example, an office will require bright lighting so that the workers can see clearly and act alert. On the other hand, living room lighting can be applied with a softer touch. Applying a dimmer has the ability to make a space much more versatile. Natural lighting should always be taken into consideration, and can be manipulated through clever placement of doors, windows and even mirrors.
Beyond its functional purpose, light has the ability to set the mood and atmosphere of a space while defining color, line and texture. Plus, any good interior designer also knows that the lighting fixtures are a visual feature in themselves, which can add the right tough to any design.
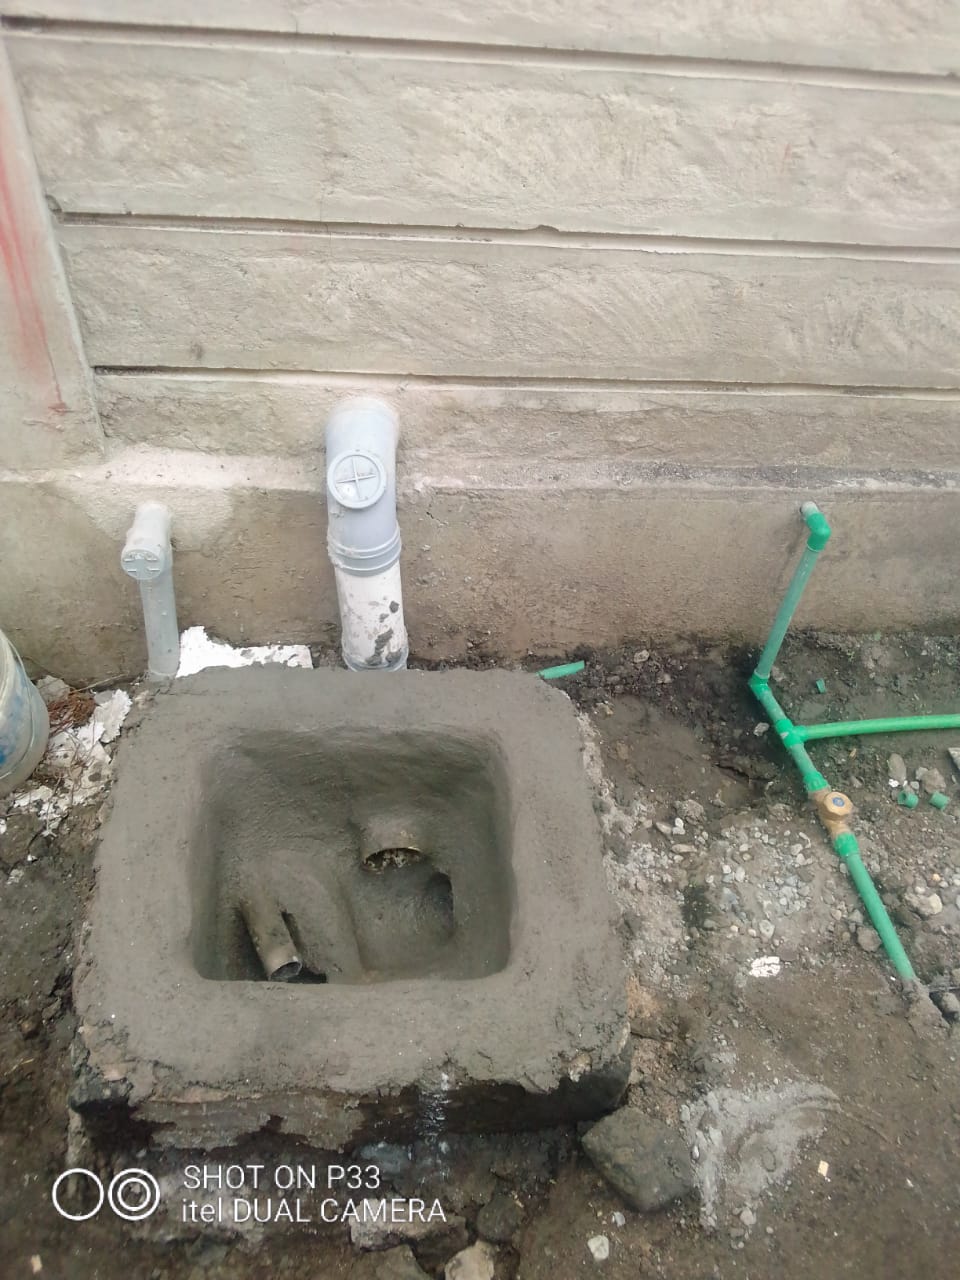
Plumbing Systems constitute work with the following:-
• Water supply pipes
• Fixture – A device that uses water (sink, toilet, dishwasher, etc.)
• Soil, waste, and vent pipes
• Drain and sewer
• Gas pipes
• Storm water drainage
Water Supply Systems are made up of the following main components:-
• Water Main – Supply pipe installed and maintained by a public entity and on public property
• Water Service – Pipe from the water main to the building supply pipes
• Meter – Measures the amount of water transported through water service
• Valve – A fitting used to control water flow (located next to the meter)
Among the Network of pipes that transport hot and cold potable water under pressure are:-
• Fixture – A device that uses water (sink, toilet, dishwasher, etc.)
• Water Heater – Large insulated tanks that heat cold water to be
distributed in the hot water supply lines
• Trunk Lines – Hot or cold water pipes that serve many fixtures
• Branch Lines – Hot or cold water pipes that serve only one or two fixtures
Drain-Waste-Vent System
Network of pipes that transport wastewater and sewer gases from the building
• Drain Pipe – A pipe that carries wastewater in a building
• Vent Pipe – A vertical pipe that provides circulation of air to and from the drainage system
• Trap – A fitting (usually U-shaped) that provides a seal to prevent the flow of sewer gases
• Stack – A vertical pipe (waste or vent) that extends through at least one story
• Cleanout – An access opening to allow cleanout of the pipe
Drain-Waste-Vent System
• Sewage – Any liquid waste containing animal or vegetable matter, including liquids containing chemicals
• Sanitary Sewer – A sewer pipe that carries only sewage
• Storm Sewer – A sewer pipe that carries storm water or other drainage (but not sewage)
• Building Sewer or Sewer Lateral – Part of the drainage system from the building to the public, private, or individual sewer disposal system
• Sewer Main – A sewer pipe installed and maintained by a public entity and on public property
Supply pipe size is always dependent upon
• Amount of water
• Water pressure
• Pipe length
• Number of stories
• Flow pressure necessary at farthest point in system